How to Do a Side Plank: Setup, Holds, and Mistakes
This post contains affiliate links. As an Amazon Associate, we earn from qualifying purchases.
Learning how to do a side plank starts with three things: knees bent, upper body propped on your elbow, and hips lifted into a straight line from head to feet. HealthLink BC’s beginner protocol holds 6 seconds, rests 10 seconds, and repeats 3-5 times per side.
That 6-second number tends to surprise people who’ve watched a 60-second plank challenge on their feed. The gap is real, and it isn’t sloppiness. NASM starts general trainees at 20-30 seconds and progresses them to 45-60. HealthLink BC, a medically reviewed provincial health service, keeps beginners at 6 seconds per hold. Different populations, different prescriptions.
What follows walks through the setup cues the credentialing bodies actually publish, the hold times they disagree about, the joint-specific stop rules most tutorials skip, and how to do a side plank compared with a loaded carry for the same job.
Key Takeaways
- Hold 6 seconds and rest 10 if you’re genuinely new, per HealthLink BC’s beginner protocol with 3-5 reps per side.
- NASM caps frequency at 2-3 times per week and states plainly that daily side planks may not be necessary.
- A 30-second hold with clean form beats a 60-second hold with a sagging hip, which is NASM’s stated position, not a slogan.
- ACE flags inner-foot or inner-knee pressure as a reason to terminate the exercise, while Children’s Colorado says stop and consult a professional on any pain and HealthLink BC offers a knees-bent regression.
- Bend the bottom leg to 90 degrees if straight legs put your shoulder or hip in a bad spot.
The Setup That Decides Everything
Setup is where the sources stop agreeing, and that’s the most useful thing to know before you lie down.
A side plank supports the body on one forearm with the hips lifted, creating an isometric hold that challenges the obliques, quadratus lumborum, and lateral hip stabilizers. NASM describes the target position as a straight line from head to feet, with the feet stacked on top of each other or staggered for additional stability.
The obliques are the muscles running down the side of your ribs. The quadratus lumborum is the deep muscle that runs along the side of the spine, and it’s the one that complains first.
Before you start: Your supporting shoulder takes load for the entire hold, so keep the elbow under the shoulder rather than out in front. Your bottom hip and knee carry your weight in the modified version, so a hard floor without a mat puts pressure straight into the joint. And if any exercise causes pain or discomfort, stop and consult a healthcare professional, which is the guidance Children’s Colorado’s pediatric spine team gives on its own demo.
Here’s how the two most-cited setups line up.
| Setup cue | ACE (modified) | NASM |
|---|---|---|
| Elbow | Bent 90 degrees, directly under the shoulder | Not specified; emphasizes the straight body line |
| Legs | Bottom leg bent to 90 degrees | Feet stacked or staggered |
| Contact points | Hips and bottom knee stay on the mat | Hips lifted, body in a straight line |
Pick the how to do a side plank version that matches what you can actually hold. If you’re following plank form on the front plank already, the side version is the same bracing idea rotated 90 degrees.
How Long Should You Hold a Side Plank?
The published sources give different answers, and the honest move is to show you all of them.
| Source | Hold time | Who it’s written for |
|---|---|---|
| HealthLink BC | 6 seconds, 10-second rest, 3-5 reps | True beginners |
| NASM | 20-30 seconds, progressing to 45-60 | General training |
The pattern underneath the numbers is a starting point plus a progression. HealthLink BC gives the most conservative entry, and NASM lands in the 20-30 second band.
So which do you use? If you’ve never held one, take the 6-second version for a week. Six seconds feels absurdly short until you actually lift your hips and hold the line.
If you can’t hold a clean 20 seconds, the answer isn’t more effort. It’s a shorter hold and a bent knee. Duration is the last variable to move, not the first.
Once 6 seconds is easy on both sides, step to 20-30 seconds. Once that’s easy, NASM’s 45-60 second ceiling is the long-term target. That’s the same logic as adding a pinch of salt to soup rather than the whole shaker, since you can always add more and you can’t take it back out.
These holds are isometric exercises, which means the muscle generates force without changing length. That’s why the clock matters less than the position holding steady.
Why Your Elbow Position Matters More Than You Think
ACE says directly under the shoulder. Those cues point in different directions, and both exist for a reason.
The ACE cue protects the shoulder joint. With the elbow stacked under the shoulder, the load travels down through the arm instead of levering the joint. You’ll notice the difference as a dull, specific ache on the outside of the supporting shoulder when the elbow drifts forward.
Moving the elbow toward the head lengthens the lever on the supporting side, which makes the hold harder and shifts more demand onto the lateral trunk. That’s a progression tool, not a beginner cue.
Start with the ACE position. Read the full ACE modified side plank guide if you want the exact starting position in their words, including the 90-degree elbow and the head-aligned-with-spine detail.
Common mistake: Letting the shoulder roll forward so the chest faces the floor. The hold gets easier immediately, which is the tell that you’ve stopped training the thing you came for.
The Modified Version for Tight Hips and Sore Shoulders
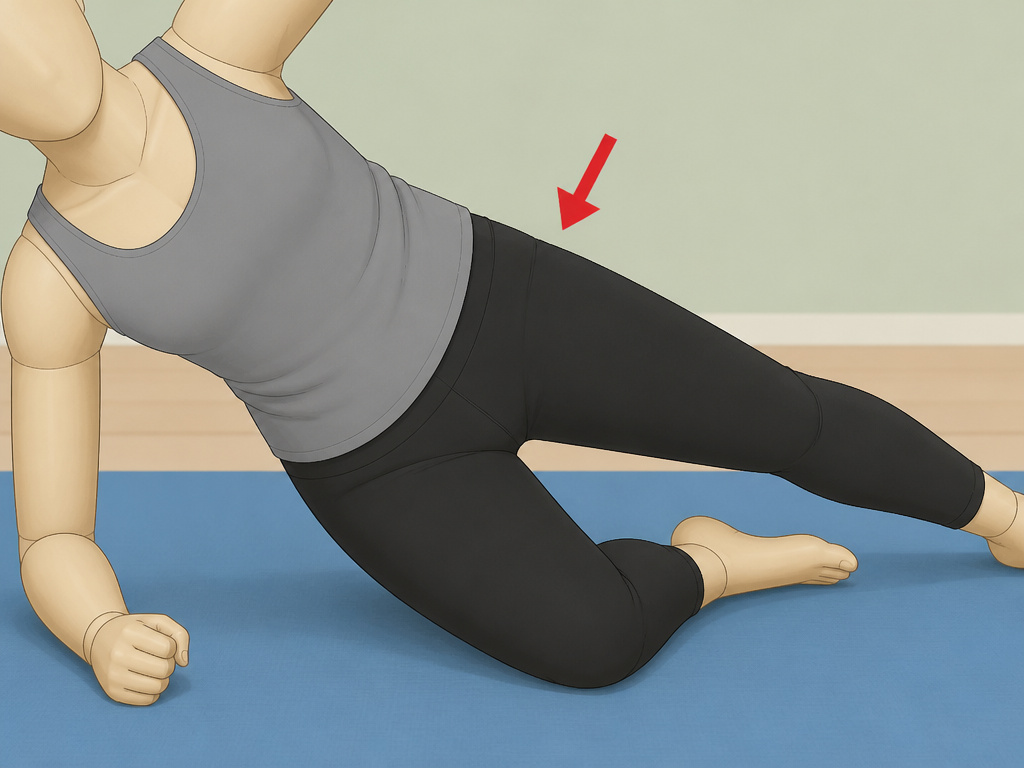
You’re on your side on a mat. The bottom leg won’t straighten without your hip hiking up, and the top hip keeps drifting toward the floor. That’s the moment most people quit the exercise entirely, and it’s the wrong call.
ACE’s modified version solves it. Bend the right leg to 90 degrees, keep the left leg extended with the inside surface of the left foot on the mat, and keep the hips and right knee in contact with the mat throughout. HealthLink BC’s beginner version takes a different route to the same place: both knees bent, upper body propped on the elbow.
Both are legitimate entry points. If your hips are tight from sitting all day, the ACE version gives you a longer lever to work with. If your shoulder is the limiting factor, the HealthLink BC version shortens the whole chain.
This is the same progression logic behind most beginner core exercises: find the version you can hold with clean mechanics, then earn the harder one.
Where this goes sideways: Bending the bottom knee but letting the top hip sag toward the floor. You end up resting on the joint instead of loading the muscle, and the hold stops doing anything after the first few seconds.
How Often Should You Train Side Planks?
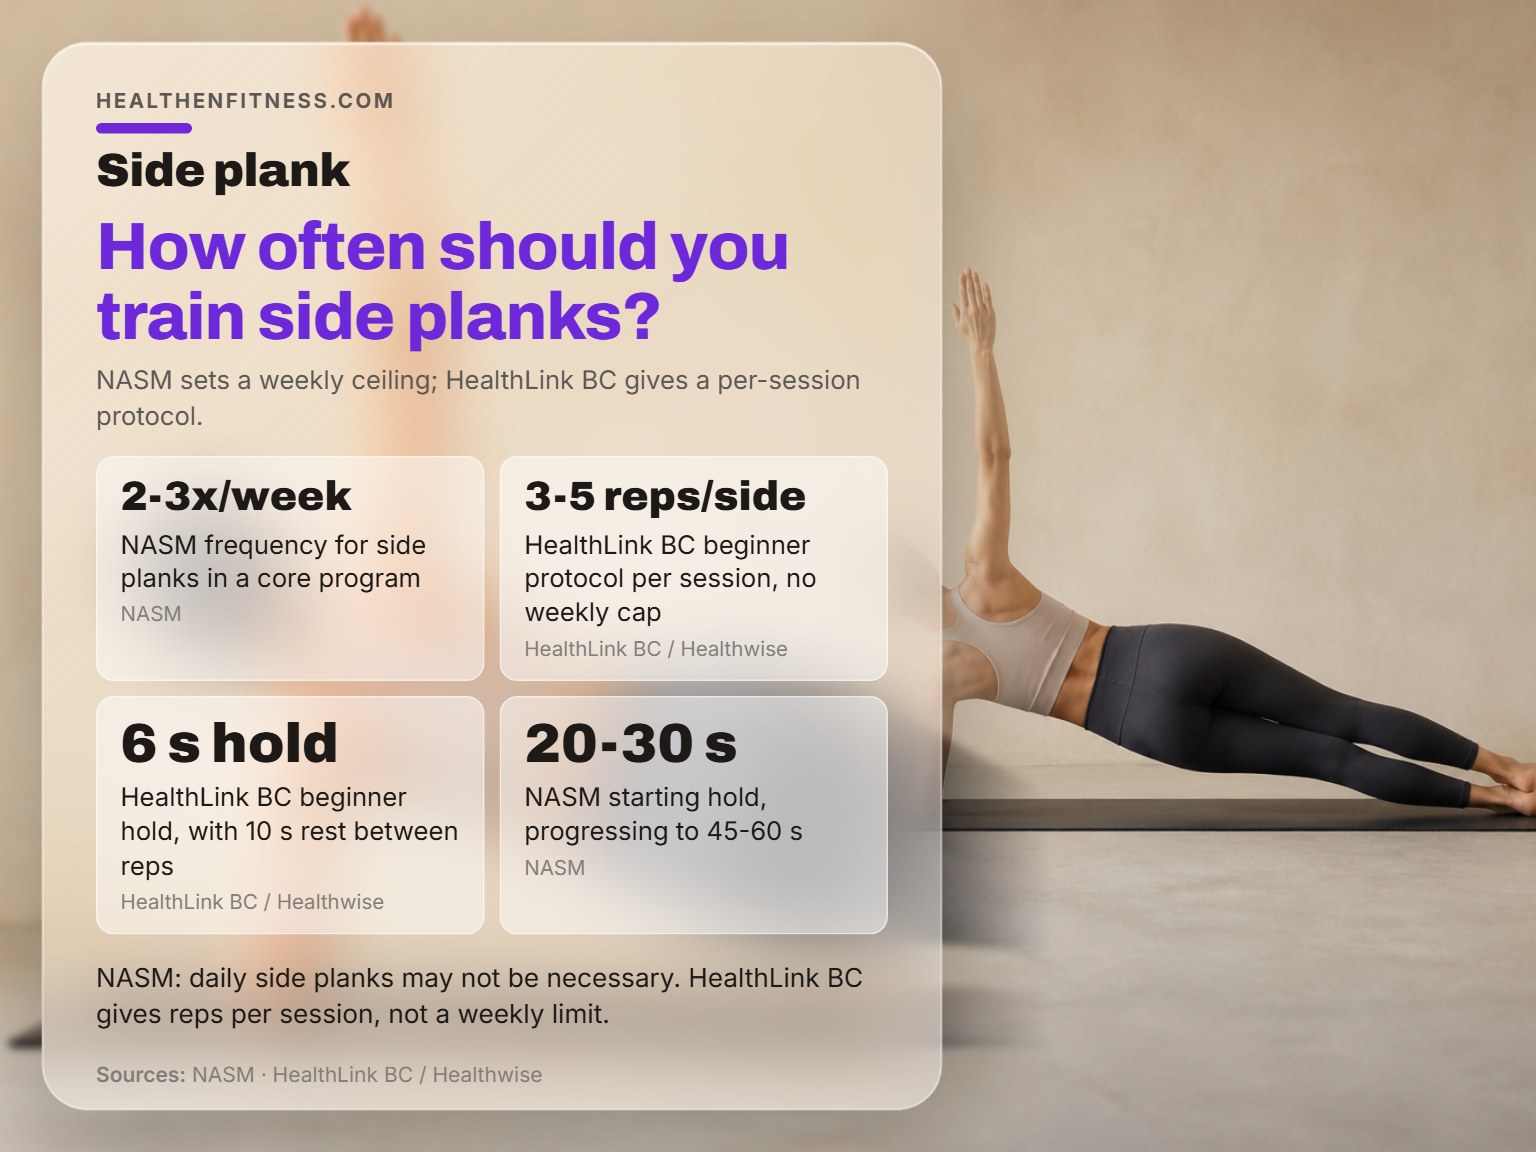
NASM’s answer is 2-3 times per week, and it states directly that daily side plank performance may not be necessary. That’s the only frequency ceiling in the sources here.
HealthLink BC gives a per-session protocol, 3-5 reps per side, without capping the week. Those two aren’t in conflict. One tells you what a session looks like, the other tells you how many sessions.
For most people training three full-body days a week, the side plank slots in as a finisher or a warm-up activation piece and the frequency question answers itself. If you’re stacking it on top of an already heavy core day, twice a week is plenty.
When to Stop: Pain, Pressure, and Form Breakdown
Children’s Colorado’s spine team says stop the exercise and consult a healthcare professional on pain or discomfort, while ACE and HealthLink BC offer regressions instead of a full stop.
That lines up with NASM’s quality-over-duration stance, though sources differ on whether to stop or regress when discomfort occurs. A 30-second plank with perfect form beats a 60-second plank with compromised mechanics, in NASM’s own words.
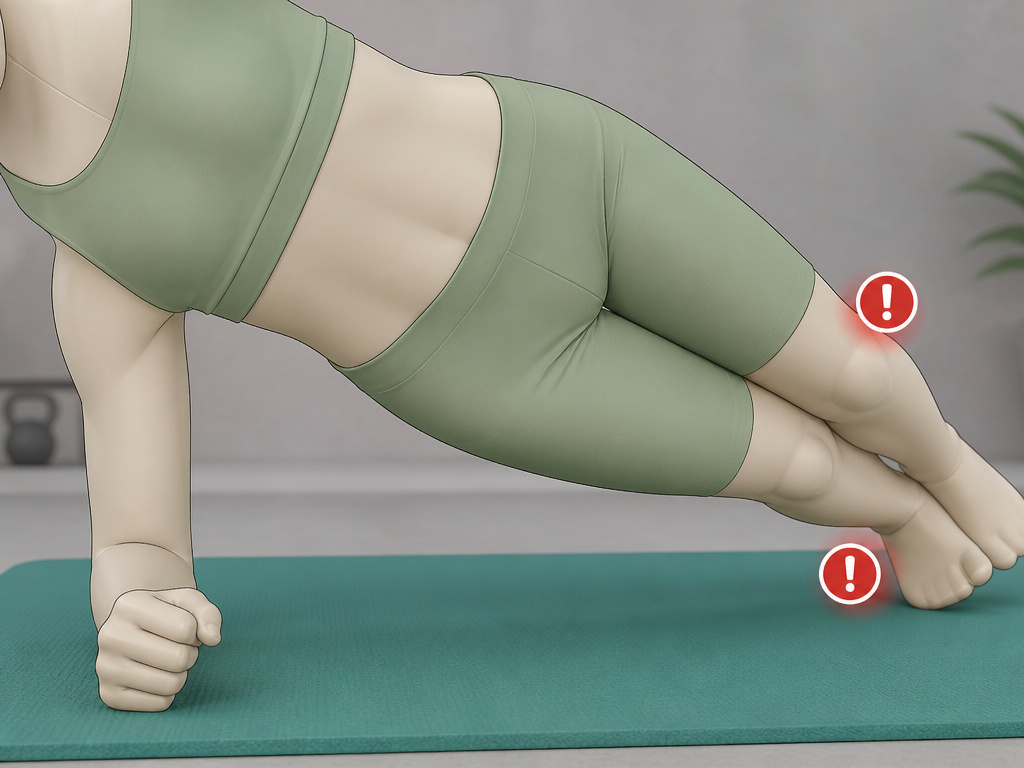
The stop rules get more specific than that. ACE flags excessive pressure on the inside of the upper foot or the upper knee as something that may cause undesirable stress on those joints and merits terminating the exercise. That’s a joint-specific rule, and it’s the one nobody repeats.
On general pain, the sources split. Children’s Colorado’s spine team says stop and consult a healthcare professional. ACE and HealthLink BC both offer regressions instead of a full stop. If the discomfort is sharp, in a joint, or sticks around after you’re off the mat, treat it as the first category. A twinge that shows up during the hold and vanishes when you stand is usually a setup problem.
Skip this if: You have an active shoulder injury or a history of wrist problems on the supporting side. There’s no version of this exercise that loads those joints less, and a core stability exercise that keeps both hands free will do the same job.
Side Plank vs Suitcase Carry for the Side Trunk
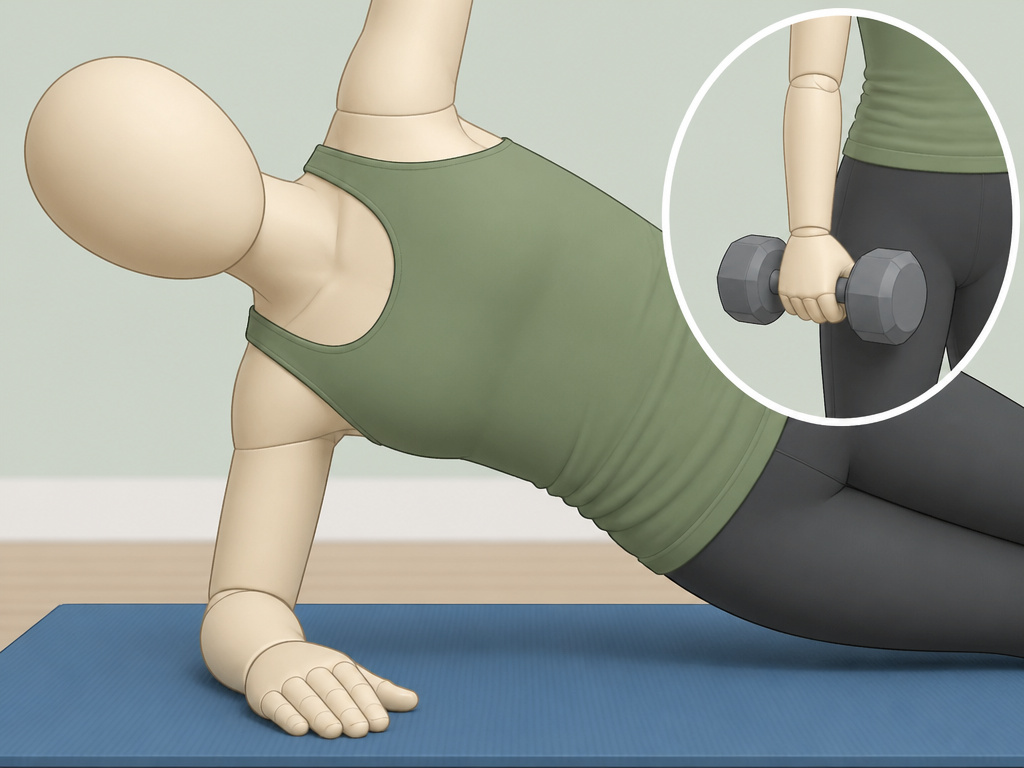
Both train the lateral trunk to resist movement, and for general fitness I’d take the carry over the plank most weeks.
The side plank is an anti-lateral-flexion hold. You’re resisting the pull of gravity trying to drop your hip. The suitcase carry does the same job under load, with the added demand of walking, and it teaches the brace in a position you actually use.
Where the plank wins: no equipment, no floor space, and a clear progression path from 6 seconds to 60. Where the carry wins: it scales with a dumbbell instead of a stopwatch, and most people find it easier to keep honest form.
If you want to build the side trunk with more variety, the oblique exercises that pair well with planks are the ones that resist rotation rather than create it. And if waist appearance is part of your goal, be realistic: waist exercises build the muscle, but they don’t outrun what you eat.
A loaded carry doesn’t need a machine. A dumbbell, a kettlebell, or a TRX suspension trainer with the handles held on one side all work. A single dumbbell on an exercise mat is enough to start.
For anyone worried about training obliques and waist width, the side plank is the safer pick of the two. It builds endurance without the heavy loading that adds thickness.
Frequently Asked Questions
How long should a beginner hold a side plank?
HealthLink BC’s beginner protocol uses 6-second holds with 10 seconds of rest between them, repeated 3-5 times per side. NASM starts general trainees at 20-30 seconds. If you’ve never done one, the 6-second version is the honest starting point.
Should your elbow be under your shoulder in a side plank?
ACE positions the elbow bent to 90 degrees and directly under the shoulder. NASM doesn’t publish an elbow cue at all, emphasizing the straight head-to-feet line instead.
Can you do side planks every day?
NASM states that daily side plank performance may not be necessary and recommends including them 2-3 times per week within a broader core program. No other source in this set gives a weekly frequency ceiling.
What muscles does a side plank work?
The obliques are the primary lateral core stabilizers during the hold, and NASM also names the quadratus lumborum, the deep muscle running along the side of the spine. The lateral hip stabilizers work to keep the hips stacked.
Is a modified side plank still worth doing?
Yes. ACE’s modified version keeps the hips and bottom knee on the mat with the bottom leg bent to 90 degrees. It loads the same lateral trunk muscles at a lower demand, which is exactly what a beginner needs.
The Bottom Line
One threshold worth writing down: if you can’t hold a clean 20 seconds with your hips lifted and your shoulder stacked, drop back to the bent-knee version. Adding time to a sloppy hold trains the sag, not the obliques.
The other thing I’d tell you plainly is that the frequency question matters less than people think. Two solid sessions a week beat five rushed ones, and NASM says as much. Start smaller than you think you need to, because the version you can repeat is the version that sticks.
I’m not a rehab specialist, and if your shoulder or lower back has a history, get a clinician’s read before you load it. (That’s not a disclaimer for its own sake. Generic exercise advice is bad at handling complicated medical history.)
Do this today: lie down, bend both knees, prop up on one elbow, lift your hips, and hold for 6 seconds. Three times each side. That’s the whole session.
