How to Do a Kettlebell Clean: Step-by-Step
This post contains affiliate links. As an Amazon Associate, we earn from qualifying purchases.
To do a kettlebell clean, set up as if for a one-arm Russian swing, drive with the hips, and pull the bell in at shoulder height so it rolls over the forearm instead of crashing. Finish with the bell, elbow, and torso locked into one unit.
The roll is the part that decides whether the rep feels like a feather or a car crash. A bell that flips up and lands flat drives its mass into bone with nothing behind it. A bell that rolls arrives across the meat of the forearm and settles near the biceps, and the impact spreads out. This is why how to do a kettlebell clean matters.
What follows is the six-point standard from CrossFit Journal #55, the two places where four credible sources flatly disagree, and the fixes for the three joints that complain.
Key Takeaways
- A correct clean should land as light as a feather, with no bruising or pain to the forearm or shoulder. Bruising that keeps showing up is a technique signal, not a toughness test.
- Start the bell at 5 o’clock with your feet at 6, hike it back to 8, and drop the elbow toward 6 at lockout.
- The rack position is genuinely contested: Martone puts the bell between forearm and biceps, while IF3 requires shoulder contact with elbows in front of the bell’s center of mass.
- Keep the wrist straight and neutral with zero flexion, and make sure you can still open your fingers in the rack.
- Build to heavy weight gradually. Elbow pain is usually a progression problem, not a grip problem.
Why a Correct Clean Lands Like a Feather
Jeff Martone’s 2007 standard for the clean opens with a claim worth taping to the wall: a properly executed rep should land as light as a feather and cause no bruising or pain to either the forearm or the shoulder.
A correct kettlebell clean finishes with the bell, elbow, and torso locked into a single unit: shoulder pressed down, armpit squeezed, triceps resting on the ribcage, and the bell seated between the forearm and the biceps. The wrist stays straight and neutral, with no flexion at any point in the movement.
That gives you a diagnostic you can use on the very next rep. Sharp pain, consistent pain, or bruising usually means one thing, and Martone is blunt about what it is: you are doing it wrong. Stop, assess, correct, then continue.
TheProgrm’s coaching blog on how to do a kettlebell clean lands in roughly the same place, with one honest caveat. Performed correctly, it says, it is quite unlikely the bell will leave your forearms or wrists bruised. But high-volume, high-rep work can still leave marks, and for those cases it recommends thick sweatbands as extra cushioning.
So the two positions are close but not identical. Martone treats any bruising as a fault. TheProgrm treats bruising as a fault at normal volume and as a manageable side effect at high volume.
Here’s the sensory version. A clean that’s working lands with a dull thump and then quiet. A clean that’s crashing lands with a slap, and the sting arrives a half second later.
The 6-Step Kettlebell Clean (and the Step Everyone Rushes)
Six steps, in this order: set, hike, snap, pull, drop, brace.
Before you start: A bell that swings past your knees at speed will find a shin or a kneecap if your hips quit early, so clear the floor around you before the first rep. Keep the bell in front of your feet rather than beside them, and end the set the moment your grip starts to slip. Bruising that appears and stays is a timing problem, so drop a bell size instead of pushing through it.
- Set the start position. Begin as if you were going to perform a one-arm Russian swing, with the arms loose and the hips doing all the work. StrongFirst’s clock model puts your feet at 6 o’clock and the bell at 5. Start too far away at 4 and your back rounds and your shoulders lose their connection to your torso; start underneath you at 6 and the hike goes weak.
- Hike the bell back. StrongFirst moves the bell to the 8 o’clock position between the thighs. Skip the hike and the bell never builds speed, so your arms take over the lift and the whole thing turns into a curl.
- Snap the hips. Contract your glutes and abs hard. Martone is explicit that this contraction generates the power to project the bell. Without it the bell arrives slow and heavy, and you absorb it with your shoulder.
- Pull in at shoulder height and let it roll. Martone’s instruction is to pull the bell into the body at shoulder height and allow it to roll over the forearm on both the negative and the positive. Let it flip up and crash instead, and you get the bruise everyone complains about.
- Drop the elbow and lock the unit. As you snap to vertical, StrongFirst cues you to quickly drop the elbow under the bell so it points at 6 o’clock. Martone wants the shoulder pressed down, the armpit squeezed tightly, and the triceps resting on the ribcage. Skip the squeeze and the bell hangs off your joint instead of your frame.
- Brace and exhale. On lockout, tighten the abs and let out a little air, the way a boxer exhales with a punch. Keep the wrists straight and neutral, with no flexion at all.
Notice that the how to do a kettlebell clean step four is where nearly all the trouble lives. It’s also the step people rush, because the bell is already moving and the instinct is to get it up there fast.
Does the Kettlebell Travel Straight Up or on an Arc?
Two respected sources describe the same bell path and then disagree about its shape.
The Case for a Vertical Path
Martone’s second standard is unambiguous: the bell should travel the shortest distance possible, following a vertical path rather than an arc, whereas StrongFirst’s SFG Clock model has the bell start at 5 o’clock and move through an 8 o’clock hike pass, a back-and-through arc rather than a vertical path. The logic is efficiency: less distance means less momentum to absorb at the top, and less momentum means less crash.
The Case for the 5-to-8 Arc
StrongFirst’s SFG Clock model describes something different. The bell starts at 5 o’clock, moves back to 8 o’clock on the hike pass, and only then travels up. That’s a back-and-through arc, not a vertical line.
Where this goes sideways: Chasing a perfectly vertical path with a heavy bell usually pulls the bell away from your body on the way up. The result is a longer lever, more momentum, and a harder catch. Pick one model and stay with it for a full training block.
My honest read: both descriptions are trying to fix the same error, which is a bell that swings out wide and slams back in. In my experience, most people fix it by moving the bell closer to their feet and changing nothing else.
How Do You Fix Forearm, Elbow, and Lower Back Pain?
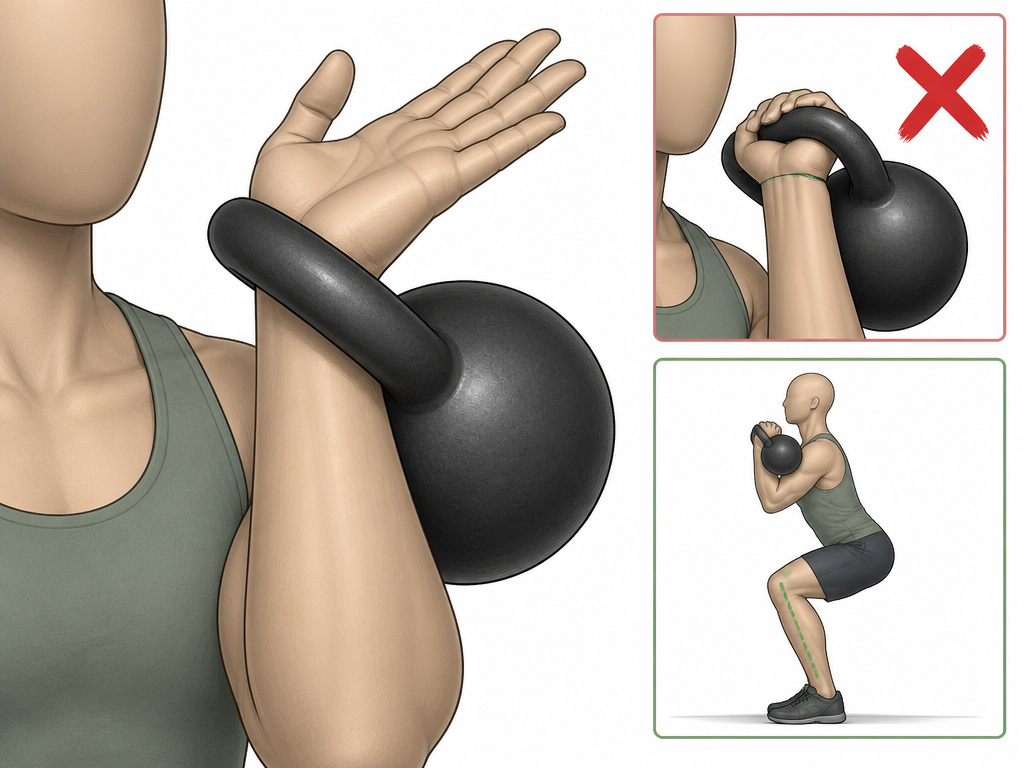
Three joints complain about the clean, and Martone’s article gives each one its own short list of fixes.
| Problem | What’s Usually Happening | Fix |
|---|---|---|
| Wrist pain | Wrist is flexing or extending under load | Keep it straight and neutral at all times |
| Elbow pain | Bell arrives before the arm is braced | Squeeze fists, lats, abs, and glutes just before contact |
| Elbow pain, ongoing | Volume or load jumped too fast | Build gradually to heavy weights or high reps |
| Lower back pain | Shins drift forward, chest closes | Sit back, keep shins near vertical, pinch shoulder blades |
The wrist fix has a second half that’s easy to miss. You should be able to extend your fingers when the bell is in the rack position, and the handle should sit diagonally across your hand like a false grip on gymnastics rings. If your fingers are locked shut, the handle is sitting too high in the palm.
The lower back list is longer than most people expect. Sit back rather than down. Keep the shins nearly vertical throughout. Hold intra-abdominal pressure and glute tension high. Keep the chest open by pinching the shoulder blades together. Inhale through your nose as the weight descends.
That last one surprises people. Most lifters hold their breath on the way down and breathe at the top. Martone reverses it.
The Rack Position Is Where the Sources Stop Agreeing
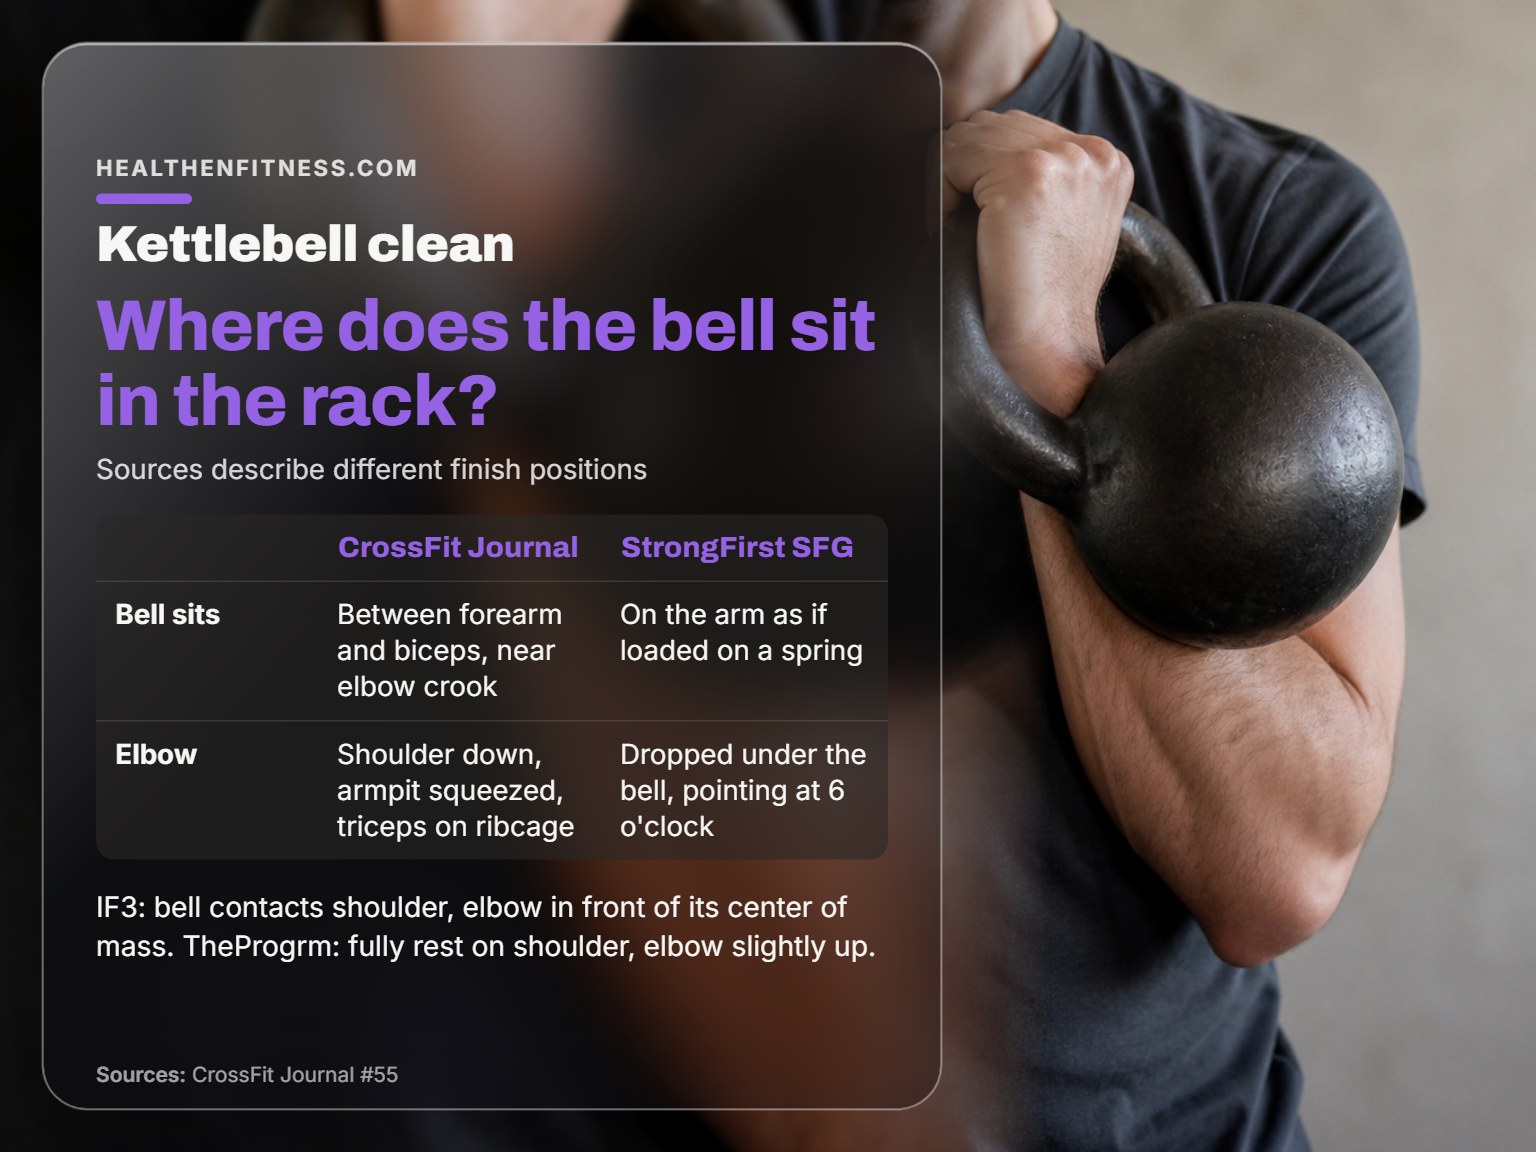
The finish position is the least settled part of the movement, and the disagreement is worth knowing before you pick a coach.
| Source | Where the Bell Sits | Elbow |
|---|---|---|
| CrossFit Journal #55 | Between forearm and biceps, near the crook of the elbow | Shoulder down, armpit squeezed, triceps on ribcage |
| IF3 Movement Standards 6.03 | In contact with the shoulder | Clearly in front of the bell’s center of mass |
| TheProgrm | Fully rested on the shoulder | Slightly raised, which aids breathing |
| StrongFirst SFG Clock | On the arm as if loaded on a spring | Dropped under the bell, pointing at 6 o’clock |
IF3’s front-rack lockout is the most codified of the four. It requires a standing tall position, the object in contact with the athlete’s shoulder or shoulders, the elbow clearly in front of the object’s center of mass, and the fist below the chin.
TheProgrm’s version is the most relaxed, and it’s honest about the trade-off. For multiple reps or long holds, it suggests fully resting the bell on the shoulder while bringing the elbow up slightly. That position is not optimal for pressing, but it lets you breathe.
StrongFirst frames the finish differently again, describing the cleaned bell as sitting on the arm as if loaded on a spring. That detail matters more than it sounds, because it’s the position a heavy kettlebell press is launched from.
If the bell leaves a mark, treat it as a message about your timing, not your forearms. Fix the timing and the mark stops showing up.
Grip and Handle: The Part That Decides Whether It Hurts
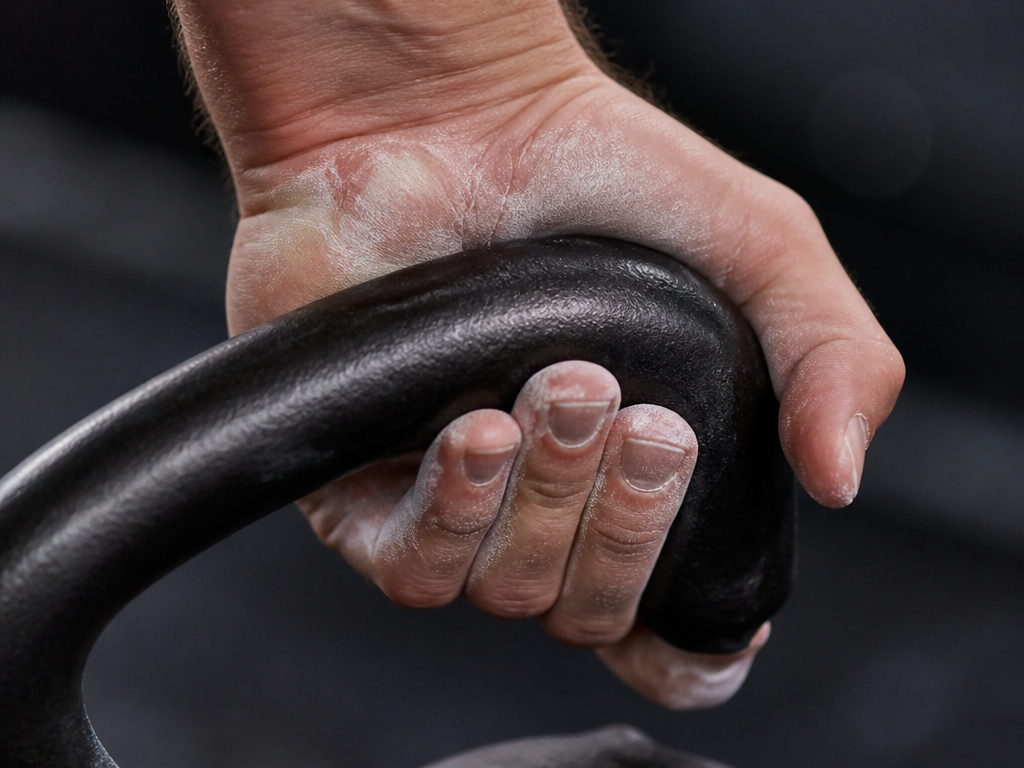
You grab the middle of the handle the way you would for a swing, swing the bell up, and it twists in your palm on the way to the rack.
TheProgrm’s fix is specific. Grab one end of the handle, almost into the hook, rather than the middle. At the start the palm should face outwardly relative to your center of balance, and the arm rotates automatically during the swing so the palm faces inward in the front rack.
That rotation is also why a slight bend in the arm helps. TheProgrm argues that a bend shortens the lever in the swing and gives more control over the weight. Martone’s standard starts from the swing with the arms loose, which leaves room for both readings.
Three things to check before your next rep:
- Fingers can open in the rack. If they can’t, the handle is too high in your palm.
- Handle runs diagonally across the hand, similar to a false grip on rings.
- Wrist stays neutral with no flexion, at every point in the rep.
If the handle still feels vague in your hand, the kettlebell grip details are worth working through before you add weight. Grip problems get louder under load.
How Heavy, How Soon?

Start lighter than your ego wants.
That progression matters here because the clean is a hinge first. Martone notes that all the points that apply to the kettlebell swing also apply to the clean, minus the straight-arm requirement. If the hinge isn’t there yet, the clean has nothing to stand on.
For equipment, look for bells with smooth handles that rotate cleanly in the hand, which matters more for cleans than for swings.
When you’re ready to choose a kettlebell weight, err light. Elbow pain, per Martone, is often solved by gradually building to heavy weights or high reps rather than by changing anything technical.
I’d rather see a beginner do more clean reps with a bell they could press than fewer reps with a bell that scares them. Timing is what you’re learning, and timing doesn’t show up under load you can’t control.
Double Kettlebells and the Split Variation
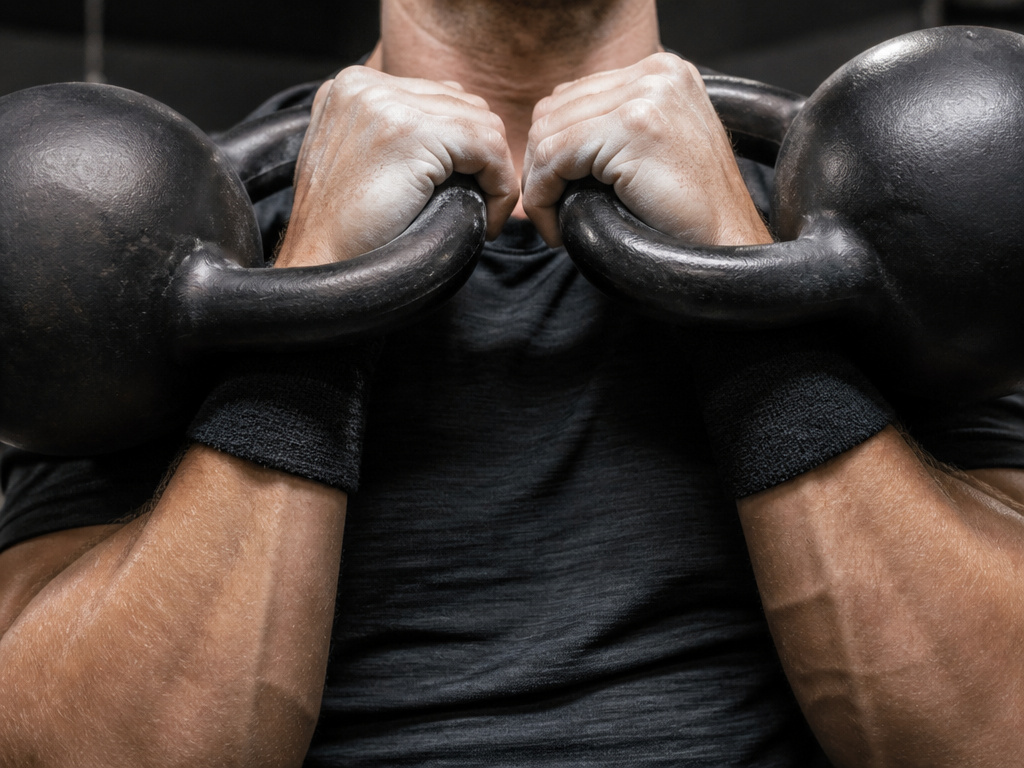
Two bells change the contact path, and the standards treat them as a separate case.
IF3 lists the equipment variants as one kettlebell performed with one hand, or two kettlebells. Its rep-start geometry is the same either way: the entire bell sits behind the vertical plane made by the tip of your toes and inside your legs. The rep-end is front-rack lockout.
IF3 also defines two variations worth knowing. V.14 is a Split, and Team Synchro is judged at rep-end. The athlete may return to rep-start in any controlled manner, which is a small mercy on high-volume sets.
The part nobody mentions: IF3’s hang position requires the shoulders to sit in front of the vertical plane, placing the object slightly lower than a deadlift lockout. That’s a lower start than most gyms teach, and it changes how much of the lift your hips can own.
One more practical note from TheProgrm: if you’re doing high-volume work that still leaves marks, thick sweatbands work as extra cushioning. That’s a volume tool, not a technique fix.
Once the clean is consistent, the clean and press is the natural next step, and the kettlebell snatch is the one after that. Neither is worth rushing. If you’re still building the basics, beginner kettlebell training covers the order I’d actually teach these in.
Frequently Asked Questions
How long does it take to learn a kettlebell clean?
The bottleneck is usually the catch, not the drive. Once the roll over the forearm stops feeling like a surprise, the movement settles quickly.
Should I wear wrist wraps or sweatbands for cleans?
Martone’s position is that a correct clean causes no bruising, so wraps shouldn’t be necessary. TheProgrm allows thick sweatbands for high-volume, high-rep work that still leaves marks. Use them as cushioning for volume, not as a substitute for fixing your timing.
Why does the kettlebell bang my forearm on the way down?
The negative half of the rep gets ignored in most tutorials. Martone’s standard specifically says to let the bell roll over the forearm on both the negative and the positive. If you’re only controlling the way up, the way down is where the bruise comes from.
Can I do kettlebell cleans if I have wrist flexibility issues?
Martone notes the kettlebell clean is a good alternative to the barbell clean, especially for people with wrist flexibility issues. The requirement is a straight, neutral wrist with no flexion, plus a handle that sits diagonally across the hand.
Is the kettlebell clean the same as a kettlebell swing?
They share a start and a hinge, but they finish in different places. StrongFirst puts it plainly: for the swing, clean, and snatch, the starting and transitional points are the same, but the final destinations differ. The swing and the clean share a start and transition but finish in different places; the clean finishes in the rack.
Where should the bell start, exactly?
StrongFirst’s clock model is the clearest answer available. Imagine your feet at 6 o’clock and place the bell at 5. Starting at 4 rounds your back; starting at 6 makes the hike weak.
The Bottom Line
The single most useful thing in the whole standard is Martone’s diagnostic: a correct clean lands light and leaves no mark. That gives you a pass or fail you can apply to every rep without a coach watching.
The honest limitation is that sources genuinely disagree on trajectory and on where the bell should sit at the finish. That’s not a gap in the research. It’s a real difference between coaching models, and you should pick one and run it for a full block rather than blending them mid-set.
One thing to try this week: a few clean reps per side with a bell you can already press, done slowly enough that you can hear the landing. If you hear a slap instead of a thump, cut the weight and work the roll before you add anything back.
That’s the boring part, and it works.
