How to Do a Plank With Proper Form: Step-by-Step
This post contains affiliate links. As an Amazon Associate, we earn from qualifying purchases.
To do a plank with proper form, set your forearms on the floor with elbows directly under your shoulders at a 90-degree angle, feet no more than hip-width apart, and hold a straight line from head to heels. The US Navy standard allows two form corrections before the test stops.
That 90-degree elbow angle is the hinge the whole position swings on. Slide the elbows forward and the shoulders carry the load; slide them back and the lower back sags into the gap. The Navy codified the number because a plank gets graded, and a graded plank needs a line nobody can argue with. Knowing how to do a plank with proper form starts with that elbow angle.
What follows is the setup, the form breaks that actually stop a test, the places where official and consumer advice split, and the modifications that keep a bad day from turning into a bad back.
Key Takeaways
- Elbows directly under shoulders at 90 degrees, feet no wider than hip-width, body straight head to heels.
- Two form corrections is the Navy limit. The third stops the clock and your time stands.
- Shaking is fine. Trembling counts as effort, not a break, as long as the position holds.
- A short clean hold beats a long sloppy one, per Banner Health.
- Knees or wall first if the full plank breaks down. The Tennessee Department of Health recommends the knee version before the full one.
The Setup Checklist That Decides Your Whole Hold
The setup decides the whole hold.
A forearm plank places the elbows directly beneath the shoulders at a 90-degree angle, with the feet no wider than hip-width and the knees straight. The pelvis sits in neutral, the hands stay unclasped, and the body holds one line from head to heels for the full duration of the hold.
Run through it in order. Skipping a step shows up in the hold, not in the setup.
- Set the forearms on the floor with elbows directly under the shoulders. Skip this and the shoulders take load they weren’t built to hold at that angle.
- Check the elbow angle at 90 degrees between forearm and upper arm. A wider angle drops the chest toward the floor within seconds.
- Place the feet no more than hip-width apart with knees straight and the bottom of the toes on the deck. Wider feet feel easier and hide a sagging hip.
- Choose fists (pinky side down) or flat palms and keep the hands unclasped if you’re testing to the Navy standard; the Tennessee Department of Health says palms facing down with no clasp rule stated.
- Tilt the pelvis to neutral and lock a straight line from head to heels. Skip the tilt and the lower back takes the load the abs should be carrying.
- Set the gaze on the floor with a neutral neck. Looking up cranes the neck and pulls the spine out of line.
You’ll feel the floor against the forearms first, then a slow burn across the upper back, then the shake in the quads.
A mat helps. Verywell Fit recommends a yoga mat or exercise mat for enough padding to be comfortable on all fours. Verywell Fit recommends a yoga mat or exercise mat for enough padding to be comfortable on all fours.
I check the elbow angle in a mirror before I start the clock. Sounds fussy. It saves the set.
What Counts as a Form Break (and What Does Not)
A wobble is not a form break.
The rule I made after my lower back rounded on the last rep of a set: when you compare a how to do a plank with proper form, the set ends when form breaks. A plank runs on the same logic. The moment the hips sag or the shoulders collapse, the hold stops counting as a plank and starts counting as a stretch with extra steps.
The Navy standard lists the moves that stop the test:
- Lowering the head to the hands ends the hold.
- Lifting the hands or feet off the deck ends the hold.
- Losing the 90-degree elbow angle ends the hold.
- Resting any part of the upper body on a vertical support ends the hold.
- Splitting the surface (upper body on the padding, feet off it) invalidates the test.
Involuntary shaking is explicitly permitted, per the Navy standard, as long as the position holds. Trembling is effort. Sagging is failure.
Where this goes sideways: Chasing a longer time by letting the hips ride high. The clock keeps running, but the abs stop working and the lower back takes over. You’ll feel it the next morning as a dull ache above the tailbone.
Two Official Standards Disagree on the Hand Position
Two official standards disagree on the hand position, and neither one is wrong for its own purpose.
The Navy is grading a test. Consumer sources are coaching a movement. That difference explains nearly every split in the table below.
| Element | US Navy standard | Consumer guides |
|---|---|---|
| Hand position | Fists or flat palms; no clasping | Palms down; no clasp rule stated |
| Elbow cue | 90 degrees, directly under shoulders | Shoulders over elbows or wrists |
| Starting position | Face down, forearms on deck | Face down, forearms and toes down |
| Correction limit | Two, then the test stops | None stated; stop if form degrades |
The Navy standard is the only one in this set with codified failure criteria. Consumer sources describe the same shape in softer language because they’re coaching, not grading.
The shoulder cue that fixes a push-up form collapse applies here too: press the floor away and keep the shoulder stacked over the elbow.
How Long Should a Plank Actually Last?
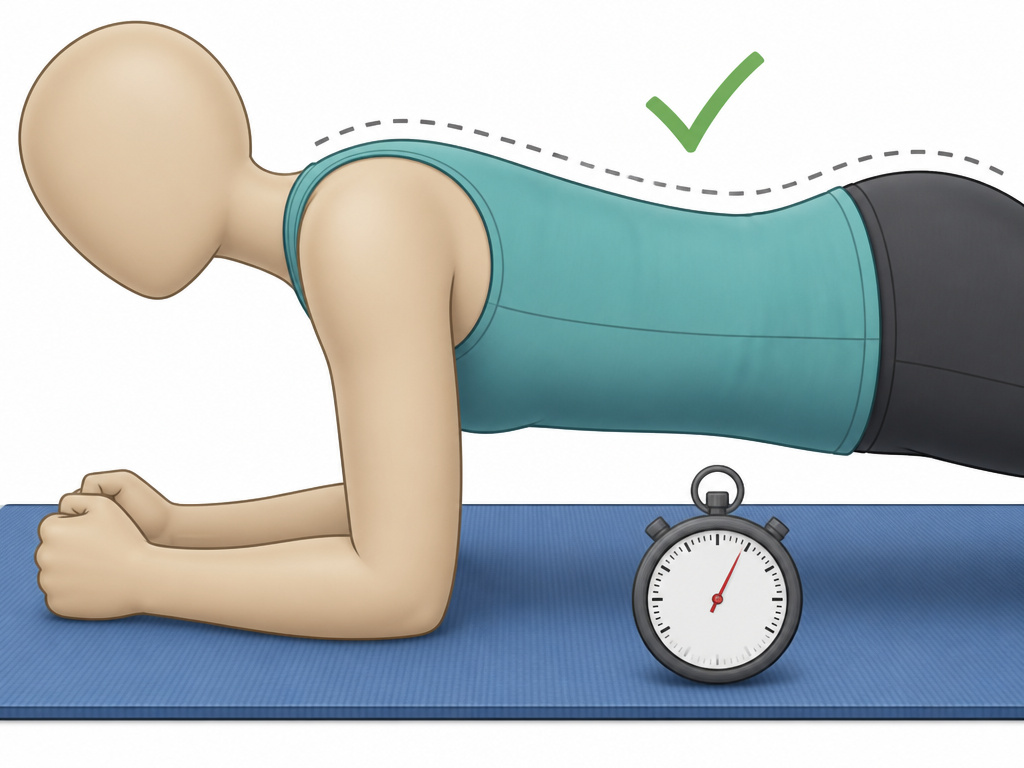
How long should a plank actually last?
It depends on whether you’re training or testing how to do a plank with proper form. Verywell Fit frames the hold as a strength goal, building up hold time progressively. The Navy frames it as a fitness test held for the maximum time allowed, stopped after the third form correction.
Same exercise, opposite finish lines.
If the hips drop, the clock stops. Reset, breathe, and start again. A stopped clock teaches more than a sloppy minute.
A plank is one of the simplest isometric holds you can do, which is why it doubles as both a training tool and a test. Somewhere into the hold, the shake starts in the quads and travels up. That’s the muscle working, not the position failing.
For calorie math, Verywell Fit notes a 150-pound person burns about 3 to 4 calories a minute holding a plank. That’s a data point, not a reason to skip cardio.
I’ve watched people hold a plank with the hips at half-mast. That’s a hip-flexor stretch with a stopwatch attached.
Modifications When the Full Plank Breaks Down
Your hips drop on the second hold. Your shoulders ache before the first thirty seconds are up. The full plank isn’t happening today.
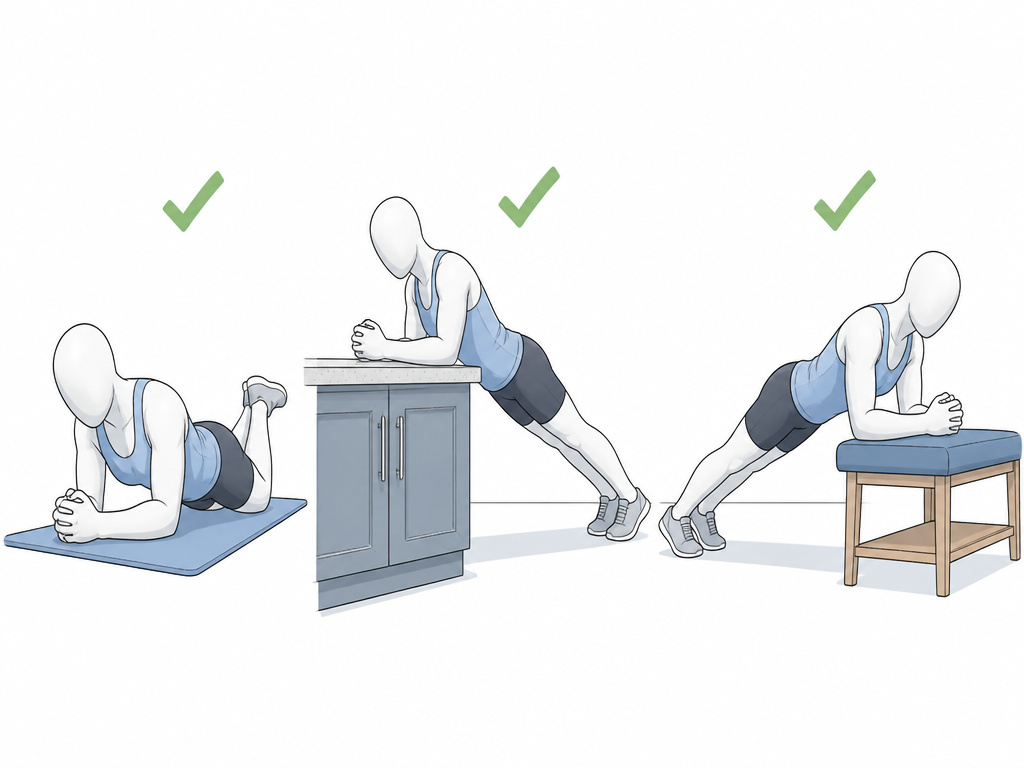
Three regressions cover almost everyone.
Knee Plank
Keep the knees on the floor, lift the torso and upper thighs, and keep the lower back from sagging or the hips from lifting. The Tennessee Department of Health recommends trying this before the full plank so you learn how to engage the core first.
Wall and Countertop Plank
If the floor version isn’t available to you, the modified plank instructions include a higher-elevation option: a wall, kitchen countertop, or other sturdy surface, with the arms extended like a push-up.
Incline Plank
Verywell Fit describes an incline plank with forearms or palms on a bench or step, elbows under shoulders, and the feet walked back until the body forms a straight diagonal.
Once the full plank is comfortable, the side plank trains the obliques without loading the lower back the same way. If you’re starting from zero, a set of beginner core exercises builds the base a plank needs.
The Cues That Keep the Line (and the Ones That Do Not)
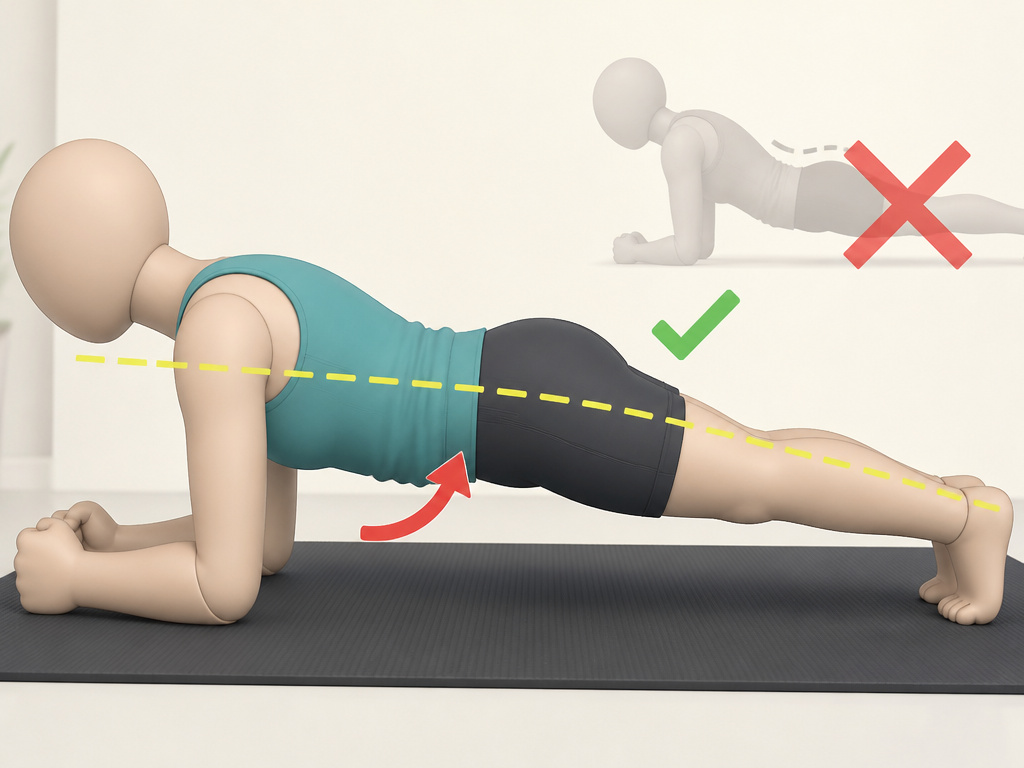
Banner Health’s guidance is blunt: a shorter plank with good form beats a longer one with sloppy form.
A plank is a core bracing drill in disguise. The same skill that keeps your spine steady under a loaded bar keeps it steady here. Brace before you lift, not after.
Pair it with a few core stability exercises through the week and the hold gets easier without you adding time. The plank vs sit-ups comparison matters here: Harvard Health notes planks work many more core muscles at once than sit-ups and crunches, which can cause back pain.
I won’t program planks for time. I program them for quality. A few clean holds beat one heroic sag every time I’ve watched a beginner try both.
The cue that doesn’t work: “squeeze your glutes harder.” Glute tension helps, but it doesn’t fix a pelvis that’s tipped forward. Tilt first, then squeeze.
The hollow body hold trains the same anti-extension pattern from the floor, which is why it pairs well with planks in a beginner program.
Common Mistakes That Turn a Plank Into a Back Ache
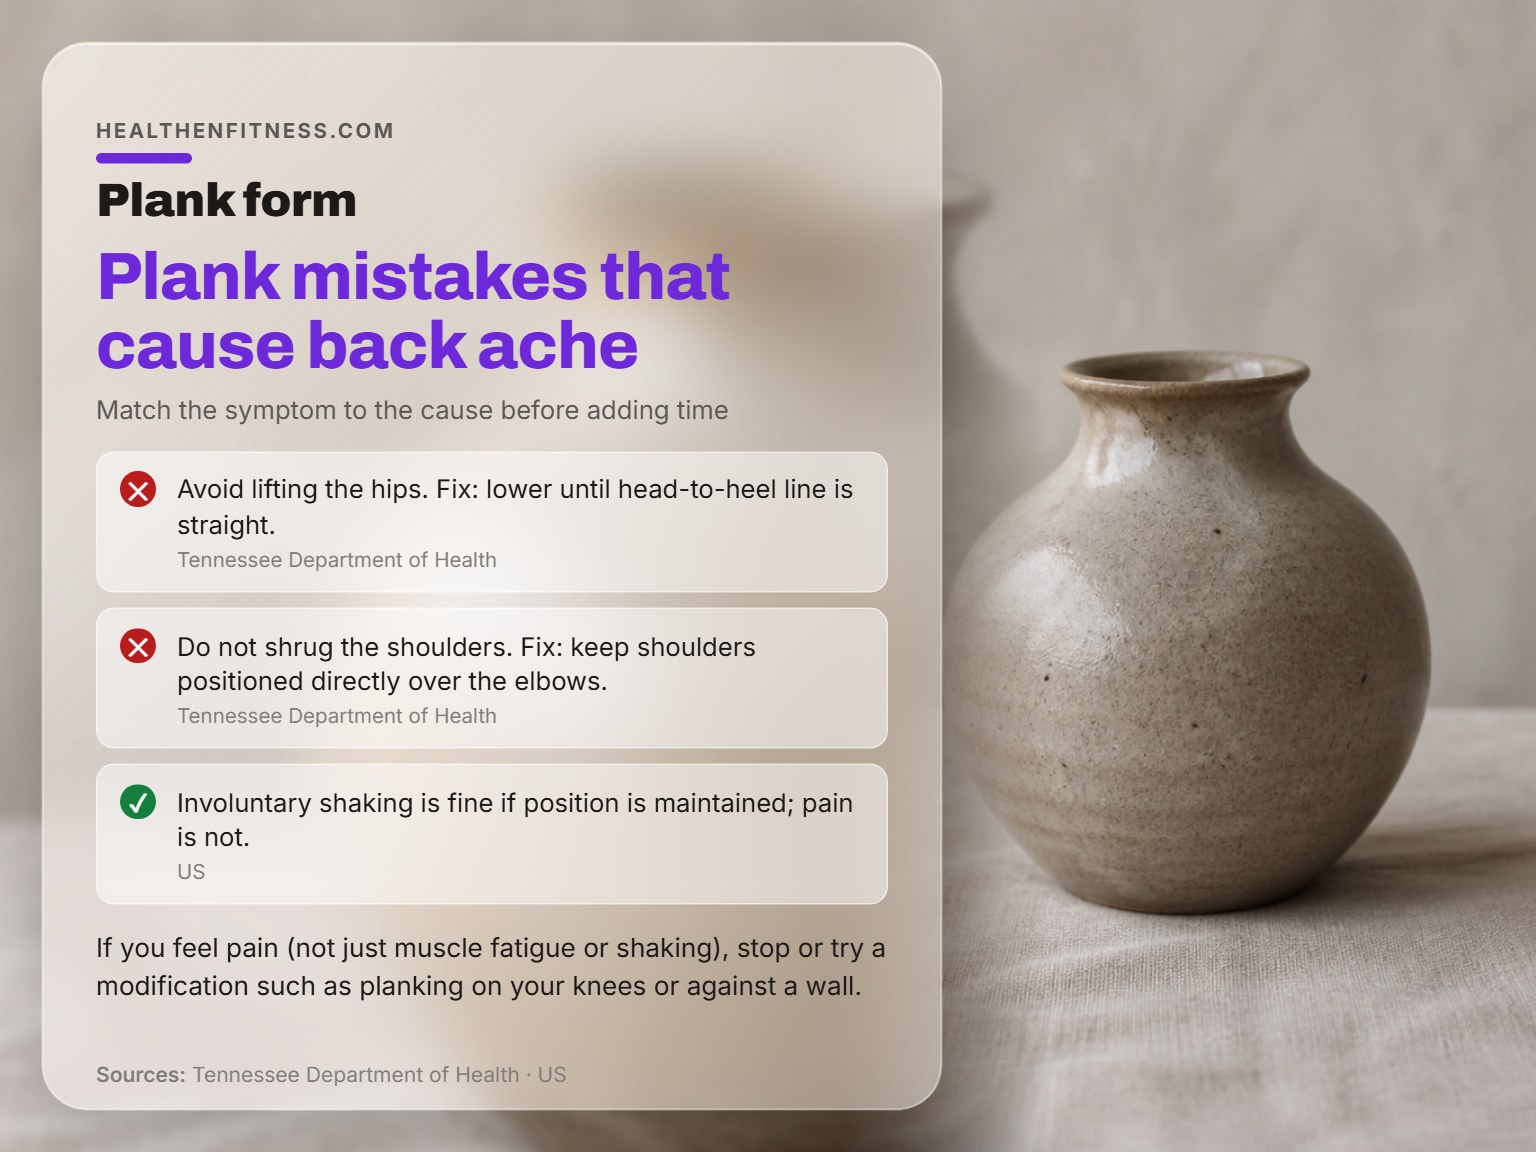
Everyone tells you to squeeze the glutes. The hips still sag.
Run the symptom against the likely cause before you add time.
| What you see | Likely cause | Fix |
|---|---|---|
| Hips sag toward the floor | Core lets go; pelvis tips forward | Tilt pelvis to neutral; brace before you lift |
| Hips ride high | Trying to make it easier | Lower until the head-to-heel line is straight |
| Shoulders creep to the ears | Shrugging under load | Press the floor away; keep shoulders over elbows |
| Lower back aches | Sagging or holding your breath | Stop, reset, breathe through the hold |
Before you start: Sharp pain in the lower back, shoulders, or wrists means stop and modify, not push through. Banner Health recommends checking with a health care provider before adding planks if you’re unsure they’re appropriate for you. Involuntary shaking is fine; pain is not.
The part nobody mentions: Holding your breath through the hold. You’ll feel lightheaded and the set ends early for the wrong reason. Breathe through it.
I used to grind out planks until my back ached the next day. The two were related.
Frequently Asked Questions
How long should I hold a plank?
It depends on your goal. Verywell Fit suggests building up hold time progressively for strength. The Navy uses the plank as a fitness test held for the maximum time allowed, stopped after the third form correction. Pick one goal and train toward it.
Should my hands be clasped in a plank?
Not per the US Navy standard, which requires fists (pinky side down) or flat palms with no clasping; the Tennessee Department of Health says palms facing down with no clasp rule stated. Consumer sources like the Tennessee Department of Health say palms facing down but don’t state a clasp rule. If you’re testing to the Navy standard, keep the hands unclasped.
Is shaking during a plank normal?
Yes. The Navy standard explicitly permits involuntary shaking or trembling as long as the position is maintained. Shaking is a sign the muscles are working. Pain is different, and it’s a signal to stop or modify.
Can I do a plank if my wrists hurt?
Try a forearm plank first, since the load moves off the wrists. If that still hurts, Banner Health recommends planking on your knees or against a wall. Verywell Fit also lists an incline plank with forearms on a bench or step as a lighter option.
How often should I plank?
Treat it like any other strength movement: a few clean sets, then rest. Treat it like any other strength movement: a few clean sets, then rest. Daily planks tend to turn into daily sloppy planks, and the form is the whole point.
The Bottom Line
Do this today: hold a plank with your elbows at 90 degrees and your hips in neutral. If you can’t hold the line, drop to a knee plank and build from there.
One threshold worth remembering: if your hips drop before the clock does, the set is over. Reset, breathe, and start again. A stopped clock teaches more than a sloppy minute.
The Harvard Health core strengthening guide makes the same point from the clinical side: good form protects you from injury and helps you gain the most benefit from each exercise. Visual learners can follow an interactive plank exercise tutorial to see the setup in motion.
Start smaller than you think you need to. A short clean hold today beats a heroic one you can’t repeat tomorrow.
